/prod01/prodbucket01/media/durham-university/external-location-photography-/city-shots-/82922-1920X290.jpg)
Working with files
The portal's File menu provides convenient ways to view, edit and rename files on Hamilton, as well as an easy way to copy files of up to a few GB to/from Hamilton. To copy larger files to/from the machine, other methods are required and are also likely to be more efficient.

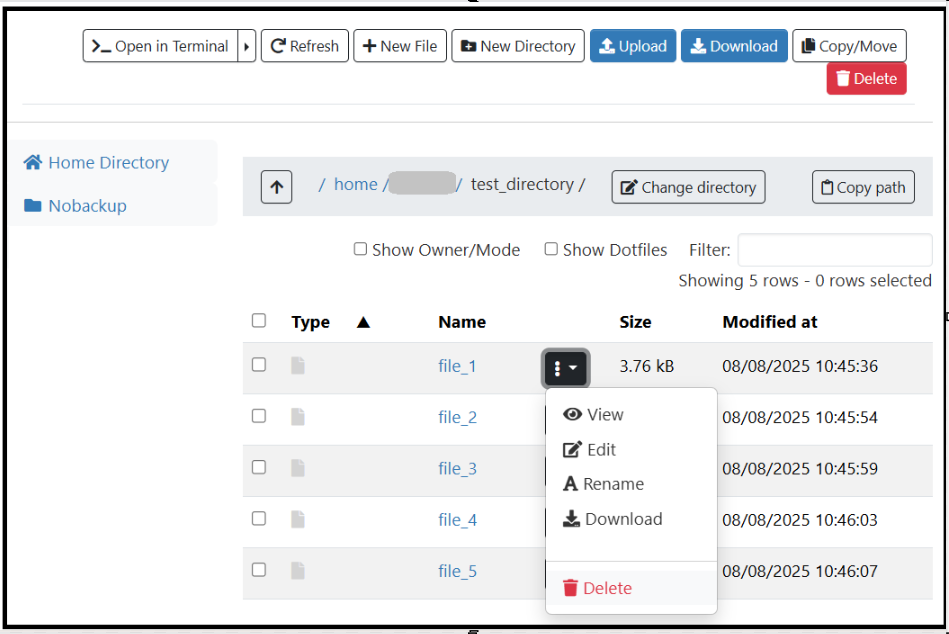
Viewing, editing or renaming files
To view, edit or rename a file that is on Hamilton:
- Click on the File menu and select an option.
- Locate the file you wish to view, edit or rename.
- Click on the square box to the right of the filename and select the action you wish to perform.
Downloading files
Single files can be downloaded using the drop-down menu shown above. For multiple files,
- Select the files you wish to download, using the tick boxes on the left of the pane.
- Either select Download from the drop-down menu as above, or click on the Download button at the top right of the pane.
Note: downloads are automatically placed in the directory (folder) on your local computer where your browser normally places downloads.
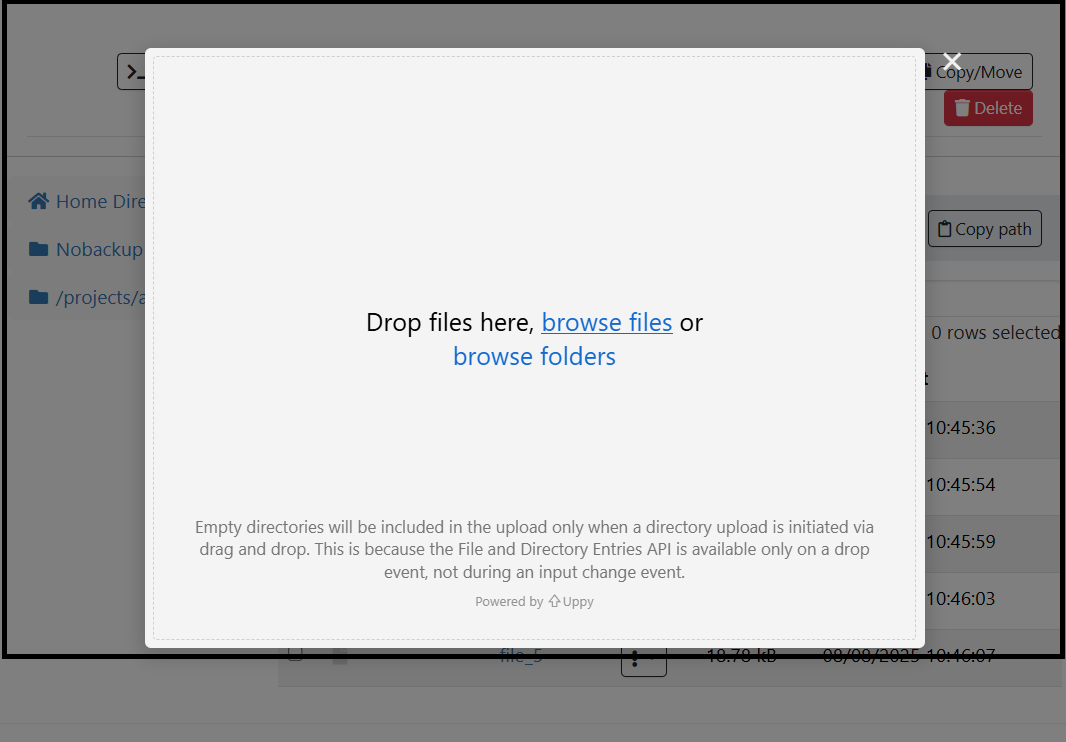
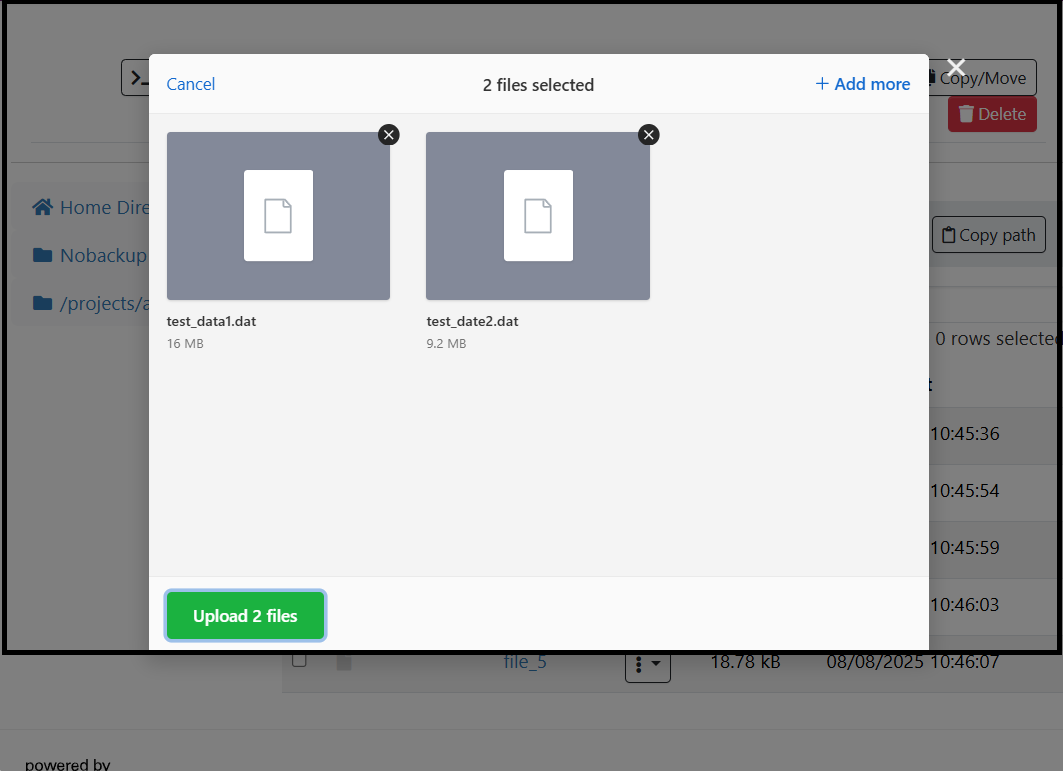
Uploading files and directories
The portal handles uploading of files separately from uploading directories (folders) and their contents.
To upload FILES only:
- In the File pane, navigate to the Hamilton directory where you wish to upload the items.
- Click on the Upload button, on the top right of the File pane.
- If you use a graphical file manager, drag and drop the files you wish to copy into the pop-up window.
- Alternatively, select Browse Files.
- Navigate to the files (not directories/folders) you wish to upload, and highlight them.
- Click on Open.
- Check the items to be uploaded, and confirm the upload.
To upload DIRECTORIES (FOLDERS):
- In the File pane, navigate to the directory where you wish to upload the items.
- Click on the Upload button, on the top right of the File pane.
- Select browse folders.
- Navigate to the folder above the one(s) you wish to upload, and highlight the FOLDERS you want.
- Check the list of items to be uploaded and then click on the green Upload button to proceed.
- Read the confirmation pop-up message and, if you are happy to continue, confirm the upload.